Skip to content
Collapse
? [[global:guest]]
Unread Recent
HOME SEARCH PROFILE NOTIFICATIONS 0 MESSAGES 0 BOOKMARKS MEMBERS BADGES
Multitool.Org Forum
MultiTool.org • Community Header Space • Watch This Space

And so it begins.... (My adventures into Alox!)

Scheduled Pinned Locked Moved The Mod Squad
6.0k Posts 1 Posters 1.3m Views
  1. Home
  2. Tool Talk
  3. The Mod Squad
  4. And so it begins.... (My adventures into Alox!)
And so it begins.... (My adventures into Alox!)
  • Oldest to Newest
  • Newest to Oldest
  • Most Votes
Reply
  • Reply as topic
Log in to reply
This topic has been deleted. Only users with topic management privileges can see it.
  • Reinier Offline
    Reinier
    Posts: 10,743
    Reinier Offline
    Reinier
    wrote on last edited by
    #40 Quote Reply

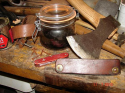
      I see the problem: you forgot the saw :ahhh

      1 Reply Last reply
      • bushidomosquito Offline
        bushidomosquito
        Posts: 660
        bushidomosquito Offline
        bushidomosquito
        wrote on last edited by bushidomosquito
        #41 Quote Reply

          @Reinier said:
          I see the problem: you forgot the saw :ahhh

          Dang, he's right. There it is in the background. :D And I see another problem. Your liners aren't titanium. :pok:

          Using Solo springs for scissors will give you plenty of spare blades so you can do all the naughty pry work that we're all afraid to subject a SAK to for fear of snapping the tip. 2 saw springs is perfect for the 91mm pliers if you take a bit off the handle and leaves you with spare saw blades so you can play rough with those as well. Scissors are $15 in a Super Tinker (and you're left with a Tinker in parts)so feel free to cut that sandpaper and trim those wires.

          Being a barrel pin modder is quite liberating.

          1 Reply Last reply
          • Syph007 Offline
            Syph007
            Global Moderators
            Posts: 9,842
            Syph007 Offline
            Syph007
            Global Moderators
            wrote on last edited by
            #42 Quote Reply

              I wasn't completely happy with how I was originally disassembling the alox saks as sometimes I'd eat into the scale with the drill bit, and when you do that to colored alox it's a real heart breaker. I've got a red scaled one with a minor imperfection that I may list for a reduced price.. my error someone else's gain. :D

              Thanks to Bushido for the tip about using a jewelers burr, now THAT is the way to go. My procedure was to use a center drill to go down into the rivet a few mm, then dremel with the jewelers burr from inside the hole, cutting the rivet cleanly from the inside.

              I practiced on 2 silver alox solos first, then I worked up the nerve to start breaking down my black pioneers. I'm pleased to say that I got this apart with no problems or marks at all. Its as if the rivets were magically removed and the pieces just fell apart! :D

              I took apart my first 84 mm this way as well and it was quite satisfying. I'm doing boring work of part cleaning and buffing now, then I can assemble some more. I've also got to do some washer making as I need 0.005 washers to add to the scissor layer so it matches the spring I use.

              1 Reply Last reply
              • bushidomosquito Offline
                bushidomosquito
                Posts: 660
                bushidomosquito Offline
                bushidomosquito
                wrote on last edited by
                #43 Quote Reply

                  http://www.usaknifemaker.com/washer-bronze-18-005-p-172.html
                  .005" thick washers with 1/8" pivot hole. The more I make by hand the more I'm thinking about ordering 500 of them. I use 2 on every tool to keep them off the liners and they really do smooth things up.

                  1 Reply Last reply
                  • armèe-suisse Offline
                    armèe-suisse
                    Posts: 406
                    armèe-suisse Offline
                    armèe-suisse
                    wrote on last edited by
                    #44 Quote Reply

                      Great work, you're doing some nice alox MOD so far. :salute:

                      :cheers:

                      1 Reply Last reply
                      • Syph007 Offline
                        Syph007
                        Global Moderators
                        Posts: 9,842
                        Syph007 Offline
                        Syph007
                        Global Moderators
                        wrote on last edited by
                        #45 Quote Reply

                          @armèe-suisse said:
                          Great work, you're doing some nice alox MOD so far. :salute:

                          :cheers:

                          Thanks! I'm enjoying learning and making what I want to. I've got some big plans so hopefully I can figure everything out!

                          1 Reply Last reply
                          • Syph007 Offline
                            Syph007
                            Global Moderators
                            Posts: 9,842
                            Syph007 Offline
                            Syph007
                            Global Moderators
                            wrote on last edited by
                            #46 Quote Reply

                              I dont have the capability quite yet, but Ive been dreaming of a mini CNC mill to be able to make my own alox scales from aluminum, and then anodize on my own to get styles and colors correct.

                              I was fiddling in the cnc app and was looking at an etch for the sak logo. Do you think making my own scales but putting the logo on it, is ok, or is that the kind of thing that would tick off victorinox? Its not like Id say it was a vic, it would be clearly a mod.

                              Hmm what do you think, have other modders put the logo on their customs?

                              Heres an example done with 2 bits in simulation mode.

                              Image.jpg

                              1 Reply Last reply
                              • Gareth Offline
                                Gareth
                                Admin Team
                                Posts: 37,725
                                Gareth Offline
                                Gareth
                                Admin Team
                                wrote on last edited by
                                #47 Quote Reply

                                  Humm. My guess would be that, like most other companies, Victorinox would have issues with anyone else using their logo, especially if there was any chance that it might be on an item for sale. :-\

                                  1 Reply Last reply
                                  • bushidomosquito Offline
                                    bushidomosquito
                                    Posts: 660
                                    bushidomosquito Offline
                                    bushidomosquito
                                    wrote on last edited by
                                    #48 Quote Reply

                                      People customize a lot of things and I've never heard of a company making a stink over it. I'd say it's no different than making your own Ford logo for a Ford that you customized with aftermarket parts. Vic sells a knife every time you sell a knife and sometimes they sell you 2 or 3 just to get parts for 1 mod.

                                      1 Reply Last reply
                                      • Syph007 Offline
                                        Syph007
                                        Global Moderators
                                        Posts: 9,842
                                        Syph007 Offline
                                        Syph007
                                        Global Moderators
                                        wrote on last edited by Syph007
                                        #49 Quote Reply

                                          Well I wanted to update this thread with my latest. Another urban pioneer is born! This one is hot off the modding table, destined for a fellow MTO member. It's my best work to date and I'm very pleased with it.

                                          I've gone through more screw variations than I want to admit, but I am 100% happy with these flathead variety. They fit like a glove in the end holes so I only need to kiss the center hole with a drill bit to get the screw to fit there. Since hardly any drilling needed to be done, the scales have the maximum amount of pivot extending into them, for maximum strength. They are also nicely flush with the surface.

                                          I'm very pleased with this one, and I hope it's new owner will be too. :D

                                          Cheers!

                                          1 Reply Last reply
                                          • Sparky415 Offline
                                            Sparky415
                                            Posts: 13,000
                                            Sparky415 Offline
                                            Sparky415
                                            wrote on last edited by
                                            #50 Quote Reply

                                              Those screws look really good! :tu:

                                              1 Reply Last reply
                                              • MultiMat Offline
                                                MultiMat
                                                Posts: 8,694
                                                MultiMat Offline
                                                MultiMat
                                                wrote on last edited by
                                                #51 Quote Reply

                                                  @Syph007 said:
                                                  OMG yes! I didn't have any problems drilling out the springs or parts to 1/8 inch. The tool components for alox SAKS start at 3mm anyhow, so not much material to remove. Small price to pay for easy assembly and servicing!

                                                  The only thing I'm wishing is for some screws that looked more like rivets. Maybe the button heads would look better. I could hit the alox scales with a milling bit to square the hole bottoms... hmmm

                                                  Mate I just saw this :o :drool: :drool: :drool:.

                                                  I am interested to hear how you did drill out the holes on the smaller components :think: :think: , I would of thought getting the smaller parts secured & drilled out would of been a bit of a head ache :think: :think:.

                                                  Urban Pioneer :drool: :drool: , If you could sneak a nail file in there some how :drool: :drool: :drool:

                                                  Great work mate :salute: :salute: :salute: :salute:

                                                  1 Reply Last reply
                                                  • Syph007 Offline
                                                    Syph007
                                                    Global Moderators
                                                    Posts: 9,842
                                                    Syph007 Offline
                                                    Syph007
                                                    Global Moderators
                                                    wrote on last edited by
                                                    #52 Quote Reply

                                                      @MultiMat said:
                                                      I am interested to hear how you did drill out the holes on the smaller components :think: :think: , I would of thought getting the smaller parts secured & drilled out would of been a bit of a head ache :think: :think:.

                                                      Its actually one of the easier steps. The hardest is deburring and polishing the inside of the holes after drilling.

                                                      I wear kevlar shop gloves since I cut myself too much, so for drilling all I do is dip the part in cutting oil, put a little oil on the carbide drill bit, then hold the part with my gloved hand and use a drill press to punch through the hole. Not having it clamped down works better for me since it kind of auto centers that way and you can 'feel' if its cutting right. It takes maybe 15 seconds to drill out a part, but more like 15 minutes to polish after.

                                                      I'm working on some wackier combinations now, but over all I love the threaded pivot pin system!

                                                      :D

                                                      1 Reply Last reply
                                                      • MultiMat Offline
                                                        MultiMat
                                                        Posts: 8,694
                                                        MultiMat Offline
                                                        MultiMat
                                                        wrote on last edited by
                                                        #53 Quote Reply

                                                          Wow holding the part just in your hand :o :o 8) 8) 8).

                                                          No putting holes in those fancy gloves :pok: :pok: :D :D , you do have some fancy fasteners you could use doing 'Orthopaedic' repairs if your drill misses :P :D :D.

                                                          Great work again mate 8) 8) 8)

                                                          Keen to see the wackie SAKies you have planned :gimme: :gimme: :D

                                                          1 Reply Last reply
                                                          • tattoosteve99 Offline
                                                            tattoosteve99
                                                            Posts: 6,326
                                                            tattoosteve99 Offline
                                                            tattoosteve99
                                                            wrote on last edited by
                                                            #54 Quote Reply

                                                              A 2 flute carbide end mill works really good ;).

                                                              1 Reply Last reply
                                                              • Syph007 Offline
                                                                Syph007
                                                                Global Moderators
                                                                Posts: 9,842
                                                                Syph007 Offline
                                                                Syph007
                                                                Global Moderators
                                                                wrote on last edited by
                                                                #55 Quote Reply

                                                                  @tattoosteve99 said:
                                                                  A 2 flute carbide end mill works really good ;).

                                                                  I tried an end mill on a spring once, but I didn't have it dead on straight and the hole was slightly off, so it's easier for me to use a regular spade bit. I haven't had a problem at all with that style.

                                                                  1 Reply Last reply
                                                                  • bushidomosquito Offline
                                                                    bushidomosquito
                                                                    Posts: 660
                                                                    bushidomosquito Offline
                                                                    bushidomosquito
                                                                    wrote on last edited by
                                                                    #56 Quote Reply

                                                                      @Syph007 said:
                                                                      I've gone through more screw variations than I want to admit, but I am 100% happy with these flathead variety. They fit like a glove in the end holes so I only need to kiss the center hole with a drill bit to get the screw to fit there. Since hardly any drilling needed to be done, the scales have the maximum amount of pivot extending into them, for maximum strength. They are also nicely flush with the surface.

                                                                      Those screw heads look great! Are you polishing them? I chuck a pin in a Dremel collet and screw the screws into it and spin them full speed while hitting them with 600 grit paper to take the machine marks out, then some Flitz on a rag and they look like chrome.

                                                                      1 Reply Last reply
                                                                      • Syph007 Offline
                                                                        Syph007
                                                                        Global Moderators
                                                                        Posts: 9,842
                                                                        Syph007 Offline
                                                                        Syph007
                                                                        Global Moderators
                                                                        wrote on last edited by Syph007
                                                                        #57 Quote Reply

                                                                          @bushidomosquito said:

                                                                          @Syph007 said:

                                                                          I've gone through more screw variations than I want to admit, but I am 100% happy with these flathead variety. They fit like a glove in the end holes so I only need to kiss the center hole with a drill bit to get the screw to fit there. Since hardly any drilling needed to be done, the scales have the maximum amount of pivot extending into them, for maximum strength. They are also nicely flush with the surface.

                                                                          Those screw heads look great! Are you polishing them? I chuck a pin in a Dremel collet and screw the screws into it and spin them full speed while hitting them with 600 grit paper to take the machine marks out, then some Flitz on a rag and they look like chrome.

                                                                          I did hit those with a buffing wheel and stainless polish, and they got pretty shiny. Putting them in a dremel would have been easier than the way I did it. I held each screw with my fingers and hit with polishing wheel in a dremel! LOL I wont be showing my son my techniques. I seem to still have freakishly strong fingers though from my years of rock climbing, so its just easier for me to hold things. I dont have a problem bending the sak backsprings by hand when I assemble. I just push hard and wiggle the part home. I thought Id have to make a jig for that, but havent had to at all.

                                                                          The other screws I had were the same profile, but these have larger hex bit, and they seem to be more visually appealing, at least to me. Of course I have 200 of the other kind still... :D Also many in black, but they dont look right.

                                                                          1 Reply Last reply
                                                                          • jds1 Offline
                                                                            jds1
                                                                            Posts: 109
                                                                            jds1 Offline
                                                                            jds1
                                                                            wrote on last edited by
                                                                            #58 Quote Reply

                                                                              The fit & finish on that Urban Pioneer is just amazing!

                                                                              Jeff

                                                                              1 Reply Last reply
                                                                              • Syph007 Offline
                                                                                Syph007
                                                                                Global Moderators
                                                                                Posts: 9,842
                                                                                Syph007 Offline
                                                                                Syph007
                                                                                Global Moderators
                                                                                wrote on last edited by
                                                                                #59 Quote Reply

                                                                                  @jds1 said:
                                                                                  The fit & finish on that Urban Pioneer is just amazing!

                                                                                  Jeff

                                                                                  Thanks! It's taken me a bit of trial and error to perfect the drilling of the outer scales so I don't mar them at all. I'm currently rebuilding my EDC sak now out to 4 layers.

                                                                                  1. 91mm combo tool / blade
                                                                                  2. pliers
                                                                                  3. cybertool bit driver
                                                                                  4. scissors

                                                                                  I keep refining what I want to have as a simple daily needs type sak. The only thing Id still like to add is a pen and tweezers, not so interested in the tootpick, but I need a pen and tweezers often.

                                                                                  1 Reply Last reply

                                                                                  Hello! It looks like you're interested in this conversation, but you don't have an account yet.

                                                                                  Getting fed up of having to scroll through the same posts each visit? When you register for an account, you'll always come back to exactly where you were before, and choose to be notified of new replies (either via email, or push notification). You'll also be able to save bookmarks and upvote posts to show your appreciation to other community members.

                                                                                  With your input, this post could be even better 💗

                                                                                  Register Login


                                                                                  1. Home
                                                                                  2. Tool Talk
                                                                                  3. The Mod Squad
                                                                                  4. And so it begins.... (My adventures into Alox!)
                                                                                  Reply
                                                                                  • Reply as topic
                                                                                  Log in to reply
                                                                                  COMMUNITY LINKS
                                                                                  EDC-TV SAKWiki GearFeed SAKSelector
                                                                                  Operational Funds

                                                                                  Help us keep the Unworkable working!

                                                                                  Make A Donation
                                                                                  November Goal: $300.00
                                                                                  Due Date: Nov 30
                                                                                  Total Receipts: $0.00
                                                                                  Below Goal: $300.00
                                                                                  0% funded
                                                                                  • Login

                                                                                  • Don't have an account? Register

                                                                                  • Login or register to search.
                                                                                  • First post
                                                                                    Last post
                                                                                  0