Skip to content
Collapse
? [[global:guest]]
Unread Recent
HOME SEARCH PROFILE NOTIFICATIONS 0 MESSAGES 0 BOOKMARKS MEMBERS BADGES
Multitool.Org Forum
MultiTool.org • Community Header Space • Watch This Space

"How-to" for 58mm modding - Pic Heavy

Scheduled Pinned Locked Moved The Mod Squad
24 Posts 1 Posters 17.5k Views
  1. Home
  2. Tool Talk
  3. The Mod Squad
  4. "How-to" for 58mm modding - Pic Heavy
"How-to" for 58mm modding - Pic Heavy
  • Oldest to Newest
  • Newest to Oldest
  • Most Votes
Reply
  • Reply as topic
Log in to reply
This topic has been deleted. Only users with topic management privileges can see it.
  • jrp316 Offline
    jrp316
    Posts: 436
    jrp316 Offline
    jrp316
    wrote on last edited by jrp316
    #1 Quote Reply

      Disassembly of a 58mm donor knife:

      Parts ready for reassembly:

      The 'required reading' thread covered the majority of the drilling and disassembly process. Basically, during disassembly, make sure that you make a good center punch mark in the pins before drilling. During drilling, you don't have to go too far. I've found that when the bushing starts to spin with the bit, you're good to go. I'm getting better at saving the bushings nowadays, so hopefully you'll have good luck with it too. If not, grab a job lot of 58mm parts knives and go to town!

      As shown above, I have the parts laid out for a Vagabond. The first layer:

      Pins have been cut to length, filed to a point and the first liner set in place for assembly as shown above. If you're doing an alox knife, no liner is required here, simply set the scale in place.

      Now, the first springs in place:

      The springs on the 58mm (74mm as well) are unique to the rest of the line in that they're floating type springs. When setting them, remember: belly in. Easy for me to remember because that's what I think when I go to the beach. When placing the springs, I like to install the one furthest first, then the closest. That way, I can preset them by simply pressing down on the spring center and pulling slightly back toward me. It sounds more complicated than it really is.

      Now, to install the tools. Have an idea of how you want to lay out your tools before you get started and the process goes so much smoother. There are two varieties of tools: single spring and double spring. Double springs are tools like scissors and the combo tools (ie, they require two springs instead of one). Most other tools only require one. For example, if you put scissors in a layer, you'll need two single spring tools (blade/nail file) or another double spring tool (combo tool) to accompany it. The spring set and tension against one another, so it's essential to keep this in mind when laying out your tool loadout.

      When installing the spring, set the pivot end on the opposite pin of where you want the tool to live.

      Set the tool onto the pin opposite the spring pivot end. When doing a double spring tool, I start with single springs on each side and build up from there. It'll hold temporarily with just one spring, don't worry. As shown below, here's a nifty way to tension the spring and set the tool.

      Grab the ends of the spring with a pair of pliers (shown here with SAK pliers) and pull them together. When you've got them pulled together enough (it doesn't take much), the tool should set into place automatically. If not, give it a gentle nudge. Do the same for the opposing end and move up to the next spring layer.

      1 Reply Last reply
      • jrp316 Offline
        jrp316
        Posts: 436
        jrp316 Offline
        jrp316
        wrote on last edited by
        #2 Quote Reply

          On the next spring layer, work continues much the same way. One note: if you're setting a two spring tool, you set the spring the same way, but you'll need to push slightly down on the spring to set it in with the tool. Be gentle and it shouldn't pop loose on you. No worries if it does pop, just set it again.

          When you're done with a layer, install a liner and continue on:
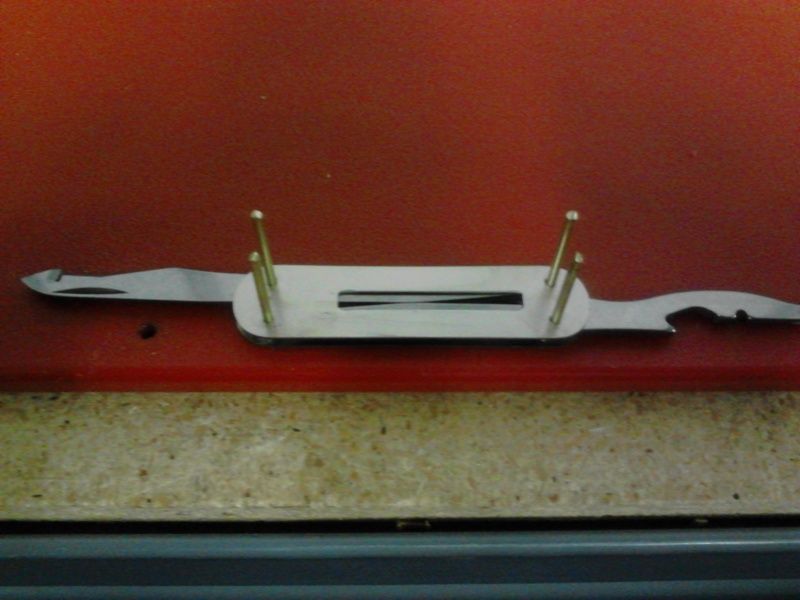
          If you're doing a USB knife, always install a liner before and after the USB layer. That'll keep the springs from popping off. The USB is easy to install (not pictured though). It's three brass bushings and the plastic tab with keyring. Decide where you want the keyring, install it there and put bushings on the other three pins.

          Setting the scissors:

          Assembly of the second layer mirrors the first. Again, having a good idea of your tool layout makes the assembly process so much smoother. In this case, I used a pic of a Vagabond as a reference.

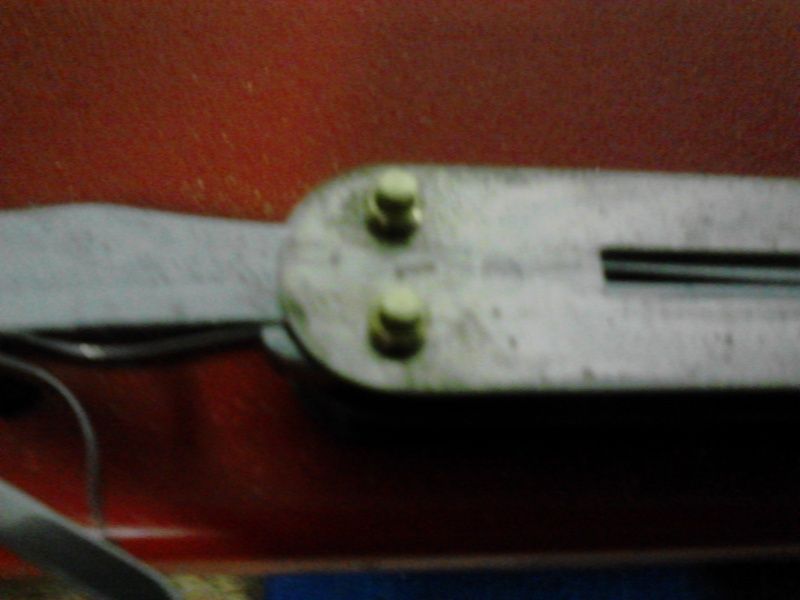
          Last liner and the peening process ready to begin. Again, if you're doing an alox knife, the outer liners are not required; the scales themselves serve as liners also.
          1 Reply Last reply
          • jrp316 Offline
            jrp316
            Posts: 436
            jrp316 Offline
            jrp316
            wrote on last edited by
            #3 Quote Reply

              Bushings installed and cutting the pin to length using a liner as a gauge (I read about this technique here, not sure who to give credit though...whoever you are, thanks!).

              I couldn't get a good pic of the bushings to show their orientation, so remember: the lip of the bushing should be at the top. While the knife is on the assembly board, you can cut the pins to proper length and file/peen the ends enough to fill the bushing, then finish peening on the opposing side. You'll waste a little bit of pin stock using this method, but it's a good tradeoff in ease of assembly.

              Finished peening:

              On the subject of peening, a little is a lot. After you cut the pin to length and file it down good and flat, make sure that you only have at most 1mm standing up from the bushing. Too much and you'll end up cracking/bending the pin before it's peened. I use a dime as a gauge (a dime is 1.3mm thick) and eyeball it from there. I shoot for .8 to 1mm to start peening.

              As shown above, a proper anvil surface is essential (I use a bench block, heavy block of steel). You can literally see the pin forming into a rivet head with each hit of the hammer. Use relatively gentle hammer blows; the weight of the tool will do most of the work for you. Let it.

              Your goal here is twofold: fill the bushing and eliminate side play in the tool served by that pin. Once the side play is good and gone, you're done. I like to start with 4-6 blows on the center of the pin followed by finishing up with mushrooming the head by hitting around the edges. I've found that getting most of the play out at first in all four pins, then fine tuning it from there is quite effective. Don't overpeen or you'll have lazy, binding tools (ask me how I know :P).

              1 Reply Last reply
              • jrp316 Offline
                jrp316
                Posts: 436
                jrp316 Offline
                jrp316
                wrote on last edited by
                #4 Quote Reply

                  And now...the money shot!

                  Red scales installed with tweezers and a pen scale on the back side. Hope you guys enjoyed this (or I at least cured your insomnia) as much as I enjoyed building it! :climber:

                  1 Reply Last reply
                  • nuphoria Offline
                    nuphoria
                    Admin Team
                    Posts: 15,038
                    nuphoria Offline
                    nuphoria
                    Admin Team
                    wrote on last edited by
                    #5 Quote Reply

                      Great stuff :tu:

                      I think this may to be a sticky... what do others think - useful guide?

                      1 Reply Last reply
                      • Syph007 Offline
                        Syph007
                        Global Moderators
                        Posts: 9,842
                        Syph007 Offline
                        Syph007
                        Global Moderators
                        wrote on last edited by
                        #6 Quote Reply

                          Hey thanks for taking the time to post up all the pics. :tu: I love to see how other folks work on SAKs.

                          So far Ive only tore down one 58 rambler, but I have an obscene amount of donor 58s coming in, and Im excited to build my mini monster. Still scratching my head on how to include the T&T on an alox version, but I think maybe making an inner layer that takes them is the only way to go.

                          I think the idea on the monster 58 build page would work just fine.

                          1 Reply Last reply
                          • enki_ck Offline
                            enki_ck
                            Global Moderators
                            Posts: 20,936
                            enki_ck Offline
                            enki_ck
                            Global Moderators
                            wrote on last edited by
                            #7 Quote Reply

                              That's a great how to. :salute: I've been planing on doing that mod for some time now and this will surely come in handy. :) Thanks for that. :tu:

                              1 Reply Last reply
                              • crackout Offline
                                crackout
                                Posts: 864
                                crackout Offline
                                crackout
                                wrote on last edited by
                                #8 Quote Reply

                                  I always loved the way these countered springs work.

                                  1 Reply Last reply
                                  • Reinier Offline
                                    Reinier
                                    Posts: 10,743
                                    Reinier Offline
                                    Reinier
                                    wrote on last edited by
                                    #9 Quote Reply

                                      remember: belly in. Easy for me to remember because that's what I think when I go to the beach

                                      :rofl:

                                      +1 :)

                                      Great how-to by the way :tu:

                                      1 Reply Last reply
                                      • Gareth Offline
                                        Gareth
                                        Admin Team
                                        Posts: 37,725
                                        Gareth Offline
                                        Gareth
                                        Admin Team
                                        wrote on last edited by
                                        #10 Quote Reply

                                          A great guide mate, thanks for taking the time. :tu:

                                          1 Reply Last reply
                                          • jrp316 Offline
                                            jrp316
                                            Posts: 436
                                            jrp316 Offline
                                            jrp316
                                            wrote on last edited by
                                            #11 Quote Reply

                                              Thanks to everyone for your positive reviews and comments! If you guys want to sticky this, I'd definitely feel honored.

                                              1 Reply Last reply
                                              • KTesh Offline
                                                KTesh
                                                Posts: 114
                                                KTesh Offline
                                                KTesh
                                                wrote on last edited by
                                                #12 Quote Reply

                                                  Perhaps a "Lord of the Stickies", One sticky to rule them all? Just one with a "How-to" label and links to the appropriate knife types. Problem is that it would have to be able to be edited after the editing cutoff has passed, and a mod (or two) may have to babysit it to add new links.

                                                  If not, then stick it because the info is very useful, and I've found that searches can be frustrating due to the nature of overlapping topics.

                                                  (BTW, Nice job on the mod! :tu:)

                                                  1 Reply Last reply
                                                  • Metropolicity Offline
                                                    Metropolicity
                                                    Posts: 3,797
                                                    Metropolicity Offline
                                                    Metropolicity
                                                    wrote on last edited by
                                                    #13 Quote Reply

                                                      @Syph007 said:
                                                      Hey thanks for taking the time to post up all the pics. :tu: I love to see how other folks work on SAKs.

                                                      So far Ive only tore down one 58 rambler, but I have an obscene amount of donor 58s coming in, and Im excited to build my mini monster. Still scratching my head on how to include the T&T on an alox version, but I think maybe making an inner layer that takes them is the only way to go.

                                                      I think the idea on the monster 58 build page would work just fine.

                                                      If you need that part designed and laser cut from clear acrylic, let me know. I have been after a mini monster since I saw it!

                                                      1 Reply Last reply
                                                      • enki_ck Offline
                                                        enki_ck
                                                        Global Moderators
                                                        Posts: 20,936
                                                        enki_ck Offline
                                                        enki_ck
                                                        Global Moderators
                                                        wrote on last edited by
                                                        #14 Quote Reply

                                                          @KTesh said:
                                                          **Perhaps a "Lord of the Stickies", One sticky to rule them all? **Just one with a "How-to" label and links to the appropriate knife types. Problem is that it would have to be able to be edited after the editing cutoff has passed, and a mod (or two) may have to babysit it to add new links.

                                                          If not, then stick it because the info is very useful, and I've found that searches can be frustrating due to the nature of overlapping topics.

                                                          (BTW, Nice job on the mod! :tu:)

                                                          They are already in the works for a few days now, the SAK MOD How to thread has already been stickied and we are gathering data for the Multitool mod link thread.

                                                          1 Reply Last reply
                                                          • Syph007 Offline
                                                            Syph007
                                                            Global Moderators
                                                            Posts: 9,842
                                                            Syph007 Offline
                                                            Syph007
                                                            Global Moderators
                                                            wrote on last edited by Syph007
                                                            #15 Quote Reply

                                                              @Metropolicity said:

                                                              @Syph007 said:

                                                              Hey thanks for taking the time to post up all the pics. :tu: I love to see how other folks work on SAKs.

                                                              So far Ive only tore down one 58 rambler, but I have an obscene amount of donor 58s coming in, and Im excited to build my mini monster. Still scratching my head on how to include the T&T on an alox version, but I think maybe making an inner layer that takes them is the only way to go.

                                                              I think the idea on the monster 58 build page would work just fine.

                                                              If you need that part designed and laser cut from clear acrylic, let me know. I have been after a mini monster since I saw it!

                                                              That might be faster... hmm. I started prototyping one from polycarbonate to see how I like the idea though. I just have to cut the channels for the T&T. I couldnt decide it it should clear or solid. I'll make one with the polycarb and if I dont like it, I'll probably do polished Ti as I have some scrap the right size. Luckily 1/8 material works perfect and since this is for a monster extra width isnt a big deal. :D

                                                              Both tools actually fit nicely horizontally, but its not possible to actually remove them once you have liners on, so that method pictured is the only decent way to do it that I can think of. Its just a matter of leaving the tiniest lip exposed to get them out.

                                                              1 Reply Last reply
                                                              • KTesh Offline
                                                                KTesh
                                                                Posts: 114
                                                                KTesh Offline
                                                                KTesh
                                                                wrote on last edited by
                                                                #16 Quote Reply

                                                                  @Syph007 said:

                                                                  @Metropolicity said:

                                                                  @Syph007 said:

                                                                  Hey thanks for taking the time to post up all the pics. :tu: I love to see how other folks work on SAKs.

                                                                  So far Ive only tore down one 58 rambler, but I have an obscene amount of donor 58s coming in, and Im excited to build my mini monster. Still scratching my head on how to include the T&T on an alox version, but I think maybe making an inner layer that takes them is the only way to go.

                                                                  I think the idea on the monster 58 build page would work just fine.

                                                                  If you need that part designed and laser cut from clear acrylic, let me know. I have been after a mini monster since I saw it!

                                                                  That might be faster... hmm. I started prototyping one from polycarbonate to see how I like the idea though. I just have to cut the channels for the T&T. I couldnt decide it it should clear or solid. I'll make one with the polycarb and if I dont like it, I'll probably do polished Ti as I have some scrap the right size. Luckily 1/8 material works perfect and since this is for a monster extra width isnt a big deal. :D

                                                                  Both tools actually fit nicely horizontally, but its not possible to actually remove them once you have liners on, so that method pictured is the only decent way to do it that I can think of. Its just a matter of leaving the tiniest lip exposed to get them out.

                                                                  Uhm... Where's the Pin's slot?

                                                                  1 Reply Last reply
                                                                  • AHB Offline
                                                                    AHB
                                                                    Admin Team
                                                                    Posts: 16,954
                                                                    AHB Offline
                                                                    AHB
                                                                    Admin Team
                                                                    wrote on last edited by
                                                                    #17 Quote Reply

                                                                      Great guide.. :hatsoff:

                                                                      1 Reply Last reply
                                                                      • Syph007 Offline
                                                                        Syph007
                                                                        Global Moderators
                                                                        Posts: 9,842
                                                                        Syph007 Offline
                                                                        Syph007
                                                                        Global Moderators
                                                                        wrote on last edited by
                                                                        #18 Quote Reply

                                                                          @KTesh said:

                                                                          @Syph007 said:

                                                                          @Metropolicity said:

                                                                          @Syph007 said:

                                                                          Hey thanks for taking the time to post up all the pics. :tu: I love to see how other folks work on SAKs.

                                                                          So far Ive only tore down one 58 rambler, but I have an obscene amount of donor 58s coming in, and Im excited to build my mini monster. Still scratching my head on how to include the T&T on an alox version, but I think maybe making an inner layer that takes them is the only way to go.

                                                                          I think the idea on the monster 58 build page would work just fine.

                                                                          If you need that part designed and laser cut from clear acrylic, let me know. I have been after a mini monster since I saw it!

                                                                          That might be faster... hmm. I started prototyping one from polycarbonate to see how I like the idea though. I just have to cut the channels for the T&T. I couldnt decide it it should clear or solid. I'll make one with the polycarb and if I dont like it, I'll probably do polished Ti as I have some scrap the right size. Luckily 1/8 material works perfect and since this is for a monster extra width isnt a big deal. :D

                                                                          Both tools actually fit nicely horizontally, but its not possible to actually remove them once you have liners on, so that method pictured is the only decent way to do it that I can think of. Its just a matter of leaving the tiniest lip exposed to get them out.

                                                                          Uhm... Where's the Pin's slot?

                                                                          Ha, good point. Might as well add the pin too!

                                                                          1 Reply Last reply
                                                                          • KTesh Offline
                                                                            KTesh
                                                                            Posts: 114
                                                                            KTesh Offline
                                                                            KTesh
                                                                            wrote on last edited by
                                                                            #19 Quote Reply

                                                                              @Syph007 said:

                                                                              @KTesh said:

                                                                              @Syph007 said:

                                                                              @Metropolicity said:

                                                                              [quote author=Syph007 link=topic=43271.msg1#msg1 date=1361540260]
                                                                              Hey thanks for taking the time to post up all the pics. :tu: I love to see how other folks work on SAKs.

                                                                              So far Ive only tore down one 58 rambler, but I have an obscene amount of donor 58s coming in, and Im excited to build my mini monster. Still scratching my head on how to include the T&T on an alox version, but I think maybe making an inner layer that takes them is the only way to go.

                                                                              I think the idea on the monster 58 build page would work just fine.

                                                                              If you need that part designed and laser cut from clear acrylic, let me know. I have been after a mini monster since I saw it!

                                                                              That might be faster... hmm. I started prototyping one from polycarbonate to see how I like the idea though. I just have to cut the channels for the T&T. I couldnt decide it it should clear or solid. I'll make one with the polycarb and if I dont like it, I'll probably do polished Ti as I have some scrap the right size. Luckily 1/8 material works perfect and since this is for a monster extra width isnt a big deal. :D

                                                                              Both tools actually fit nicely horizontally, but its not possible to actually remove them once you have liners on, so that method pictured is the only decent way to do it that I can think of. Its just a matter of leaving the tiniest lip exposed to get them out.

                                                                              Uhm... Where's the Pin's slot?

                                                                              Ha, good point. Might as well add the pin too!
                                                                              [/quote]

                                                                              I'm not familiar with the specs of the knife you are making, but would a pen/stylus fit too?

                                                                              1 Reply Last reply
                                                                              • oreogaborio Offline
                                                                                oreogaborio
                                                                                Posts: 71
                                                                                oreogaborio Offline
                                                                                oreogaborio
                                                                                wrote on last edited by oreogaborio
                                                                                #20 Quote Reply

                                                                                  Syph, I might have an idea... :D

                                                                                  1 Reply Last reply

                                                                                  Hello! It looks like you're interested in this conversation, but you don't have an account yet.

                                                                                  Getting fed up of having to scroll through the same posts each visit? When you register for an account, you'll always come back to exactly where you were before, and choose to be notified of new replies (either via email, or push notification). You'll also be able to save bookmarks and upvote posts to show your appreciation to other community members.

                                                                                  With your input, this post could be even better 💗

                                                                                  Register Login


                                                                                  • 1
                                                                                  • 2
                                                                                  1. Home
                                                                                  2. Tool Talk
                                                                                  3. The Mod Squad
                                                                                  4. "How-to" for 58mm modding - Pic Heavy
                                                                                  Reply
                                                                                  • Reply as topic
                                                                                  Log in to reply
                                                                                  COMMUNITY LINKS
                                                                                  EDC-TV SAKWiki GearFeed SAKSelector
                                                                                  Operational Funds

                                                                                  Help us keep the Unworkable working!

                                                                                  Make A Donation
                                                                                  November Goal: $300.00
                                                                                  Due Date: Nov 30
                                                                                  Total Receipts: $0.00
                                                                                  Below Goal: $300.00
                                                                                  0% funded
                                                                                  • Login

                                                                                  • Don't have an account? Register

                                                                                  • Login or register to search.
                                                                                  • First post
                                                                                    Last post
                                                                                  0